How to Fit or Replace Window Catches: What to Know
If your windows aren’t closing quite right – or they’ve started looking a bit tired – it’s probably down to the catch. These little bits of hardware might seem minor, but they do a lot of the heavy lifting when it comes to home security and insulation.
If you’re wondering how to install a window catch or just need to replace a wobbly one, the good news is you don’t need a van full of tools or a whole afternoon to get it sorted.
This guide walks you through what’s what, from picking the right type to making sure it’s fitted straight and snug on the first go.
What Are Window Catches?

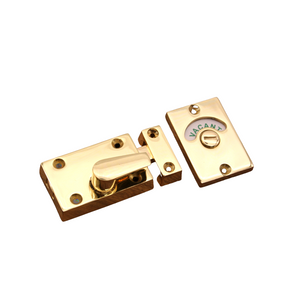
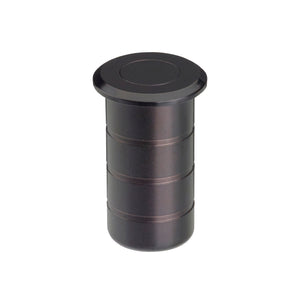
A window catch is the small but mighty bit of hardware that helps keep your windows securely shut – or held open, depending on the type. You’ll see them most often on sash and casement windows, though they come in all shapes and sizes. Some are simple twist latches, others lock into place for added safety, especially useful if you're keen on improving your home’s window security hardware without changing the entire frame.
So, whether you’re dealing with a draughty sash window catch or something that’s just not sitting flush anymore, it’s worth checking if it’s time for an upgrade. You can explore a range of window catches that match both traditional and modern interiors, giving your windows a tidy, well-finished feel without fuss.
When Should You Replace Them?
It’s easy to ignore a loose or stiff window catch – until it either stops working altogether or starts letting in a chilly breeze. If you’ve noticed your catch wobbling, not holding properly, or showing rust or flaking paint, it’s probably time to replace the window catch with something sturdier.
In some cases, the issue isn’t just wear and tear. It might be that the fitting was never quite right in the first place, especially in older homes where the window hardware has seen better days. Poor alignment can mess with insulation, too, which might explain the cold spots creeping in around the frame.
A new sash window catch can make a big difference to both comfort and safety. And let’s face it – a clean, well-fitted latch just looks better. If you’re already doing a bit of DIY window fitting, updating the catch is a quick win worth doing.
Tools and Materials You'll Need
Before you start, it’s worth getting everything together in one go – nothing slows you down like stopping mid-job to find the right screwdriver. The good news is, you probably already have most of what you need in a basic toolbox.
Here’s what you’ll want to have to hand:
- Flathead or Phillips screwdriver (depends on the screw type)
- Measuring tape or ruler
- Pencil for marking drill points
- Electric drill (optional – speeds things up)
- Suitable screws (often come with the new catch)
- New window catch or latch
- Spirit level (to keep things tidy)
- Small hammer (just in case something’s stubborn)
Once your kit’s sorted, fitting the new hardware gets a lot smoother.
Step-by-Step: How to Fit or Replace a Window Catch

Actually, replacing a window catch might seem fiddly, but once you break it down, it’s more or less a straightforward DIY window fitting job. Just take your time, double-check your markings, and don’t overtighten the screws.
Here’s how to fit window hardware without the faff:
1. Measure and mark the placement
Start by lining up the new catch with where the old one sat – or where it makes most sense to place it. Use your pencil and ruler to mark screw holes. For sash window catches, double-check both parts meet flush when closed.
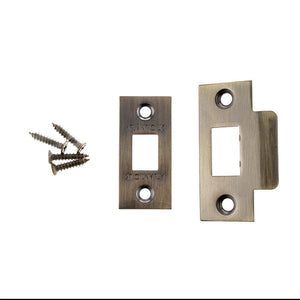
2. Remove the old window catch
Using the correct screwdriver, carefully loosen the screws holding the old latch in place. If the screws are worn or painted over, you might need a small hammer and a flathead to ease them out.
3. Align the new catch
Place the new catch exactly where you marked earlier. Use a spirit level if needed. Hold it firmly in place while preparing to screw it in.
4. Install the screws
Drill pilot holes if the wood feels hard or old. Then screw the catch into place, making sure it sits snug but not overly tight.
5. Test everything
Open and close the window a few times to make sure the latch lines up and works smoothly.
That’s your window latch replacement done and dusted.
Common Issues and How to Avoid Them
Even the simplest jobs throw up a few hiccups, but most are easy to sort if you know what to watch for. Here are a few things that could go wrong while you fit window hardware, plus how to sidestep them:
- Misalignment
If the two parts of the catch don’t line up, the window won’t lock properly. Double-check your markings and use a spirit level before drilling anything.
- Loose screws
This usually happens when old screw holes have widened. Try using slightly thicker screws or wooden matchsticks dipped in glue to fill the gap before re-screwing.
- Frame damage
Forcing screws or over-tightening can split older timber. Pre-drill holes and tighten screws gradually to keep everything intact.
- Poor closure
If the window still feels loose or doesn’t seal right, the catch might be in the wrong place. Loosen it slightly, adjust its position, and retest.
A steady hand and a bit of patience go a long way here – it’s rarely the tools, just the pacing.
Getting your window catches sorted isn’t just about the look – it helps with insulation, peace of mind, and that satisfying click when everything’s lined up just right. Whether you’re swapping out a rusty sash window catch or fitting fresh hardware across the whole house, a small change can make a big difference.
Love Handles offers a broad range of window security hardware that’s both reliable and easy on the eye. Got questions about fittings or styles? Just head over to our contact us page – we’re happy to help.